Search This Blog

Showing posts with label 6mm. Show all posts

Wednesday, April 14, 2021

Small scale (6mm / 10mm) 3d printed forest

 I have finally painted up my 3d printed trees for 6mm / 10mm figures.  The prime requirement I had for this little project was that the trees be robust and durable.  While not as pretty as model railway trees I think they look pretty good.

The files are HERE

Here is the forest...


And next to some figures for size comparisons.  I printed the trees at 55% - 60%


Left to right:
  • A T-34/85 that is 1/150 scale
  • 10mm Pendraken figures
  • 6mm Baccus foot
  • 6mm Baccus mounted

Good Gaming!

Sunday, March 29, 2020

I have posted 3D Print files for 10mm / 6mm trees

I have posted the files I used for the 3d printed trees in yesterday's post, they are on Thingieverse here: https://www.thingiverse.com/thing:4248630

I have not painted mine up yet.  Today was the task of adding decals to a couple of T-34/85's.  I have to let the set, seal them, then I will share.

Enjoy and good gaming!


Saturday, January 25, 2020

How I paint irregulars and militia

Never fear, my new found addiction to 3d printing has not stopped all progress on my 3mm Eastern Front, Double-Blind game project. 

I have the support troops for the Soviet Tank Corps done and almost finished basing, they are not quite camera ready. It includes the motorcycle battalion, artillery in 76mm, 122mm, and Katyusha flavors, and attached assault gun and anti-tank regiments including SU-76, SU-85, and SU-152.  Additionally, I have 3d printed some custom markers to help me keep up with firing units and motorized movement.

I do have to admit that Kaptain Kobold's WW1 games are tempting me to get my Trench Hammer stuff out again.  I think after I get the Soviets, I will take an intermission, finish painting and prepping my 3d printed trenches I have scaled for my 10mm troops and get a couple fo games in, to clean my palette, then on to start painting the Panzer Division in 3mm.

Meanwhile, I wanted to get something posted, so here is a short entry.

Painting regular troops, at any scale, is much easier to do in assembly-line fashion than irregulars or militia.  One of my half-completed projects is my 6mm AWI Skirmish troops for Rebels and Patriots or Sharp Practice 2.  This requires a LOT of militia and I find that I have "analysis paralysis" when trying to decide how to paint them.

So... I have developed a method to make it easier.  I had thought it was an amazing, original idea, but I have seen a lot of variations on this.  What I do is this:

  1. Identify what you are going to paint for your batch of figures, pants, shirts, etc.  I paint my 6mm in batches of 16 (4 x Baccus strips) glued to a piece fo wood.
  2. Pick a set of colors, 6 works best.
  3. Put a sample of each color on an index card and assign it a number from 1-6
  4. Get your paint ready by lining up the bottles or preparing your palette.
  5. Roll 16 x d6 and line them up in a row
  6. run through the dice left to right and paint the figures left to right with the color indicated by the die.
  7. I mix up the dice sometimes if I have 3 or 4 of the same color in a row, but otherwise, I ruthless force myself to use the color indicated and not think about it too much (so I don't slow down)
  8. When done, I repeat the same process for the next article of clothing.
I use a similar process for painting horses and it really helps me just get on with it.

Here is a sample of my randomizer cards, you can see how I set the frequency of the horse colors, and I actually use a d10 for the coats/shirts, giving a lot of variety, without having to think about it.

I hope this is helpful.

Now I am going heads down to work on grad school, but until next time, good gaming!


Thursday, December 12, 2019

3d Printed, 6mm Snake Rail Fence (and use your local library!)

(Note: yes, I know this is a distraction and pulling my limited spare time from my main project, but... this is awesome!  We will be returning to our regularly scheduled programming soon)

I finally decided to give 3d printing a try.  What pushed me over the edge is my wife is now working for the county library system, and they just so happen to have a "Maker Space" at the main branch that includes three 3D Printers!  You can print at $1.50 an hour, and this is a great way to try 3D printing before you invest in a printer or a way to get a few terrain pieces cheap.


Contact your local public library and see if they have something similar!

I am eventually going to finish my 6mm Rebels and Patriots project, so for a proof of concept, I decided to print some 6mm split rail fences.  I found exactly what I needed for FREE on Thingiverse HERE.  All I had to do was download the files, copy them to a thumb drive, and take them in.  The ones below took 2 hours to print and only cost me $3.00!


Here is one of the sections, which is about 100mm / 4 inches long, with painted (but not flocked) Baccus AWI militia, on 3mm thick bases, to give you an idea.

I am trying to stay focused on my 3mm East Front project. so I have not painted these yet.  But they are waiting for me in a drawer for when I am.  The files at the link above have a few different styles and lengths to meet your needs.

So... Guess what I am getting for Christmas!  Now back to trying to wrap up the Motor Rifle Brigade of my Tank Corps...

Good Gaming!

Friday, May 24, 2019

Making Plans again...

Every few years I go through a cycle of:
A) Selling off a bunch of incomplete projects and simplifying and
B) Then slow accumulating more incomplete projects

Not the first time I have done this, and never successfully, but I am going to try to make a plan.

I have bags of 6mm figures for a 10th / 11th Century project for the Normans in Italy and 1066-ish in Britain (those Normans were everywhere!) Plus some Orcs so I can lure my wife into playing a Lord of the Rings themed game.

My basing scheme is everything goes on an 80mm x 40mm base, except light infantry which gets an 80mm x 20mm base.   I am using Niel Thomas's Ancient and Medieval Wargaming lists as a base for my forces.  This will give an army of 8 bases, which feels like a good size for my playing area and the size of the game I want to play.

Rules will probably be modified One Hour Wargames, but I need to get cracking on the painting.

So, I have made a table where I can track my overall progress


As I finish a base, I will be marking them off in gray.

A couple of points:

  • This should allow me to do any combination from the army lists
  • Why so many Normans? Well, Normans also had a habit of fighting amongst themselves
  • All figures are from Baccus Codes, with some exceptions:
    • Byzantines are a combination of late Roman Infantry, Seljuk Lancers, Sassanid heavy Horse Archers, and Roman Cataphracts.  I borrowed the idea from Roll a One
    • Orcs are from Microworld Games, I use Hobgoblins
    • Lombards?  I need them to fight Byzantines, Saracens, and Normans.  I am using Goth Heavy Cavalry.  Combined with Viking and Anglo-Saxon unarmored spearmen, they should do the trick.  I am assuming they were slower to adopt the kite shield, so will let me easily distinguish them from Normans and they can serve as 9th Century Franks to fend off Viking attacks.


I am home sick today, after going to the doctor I am going to try to knock out a few units.  Let's see how long I can keep my focus!


Sunday, November 11, 2018

CSS Hunley and a 6mm AWI Hex game

Just back from helping my wife chaperone her 8th-grade field trip to Charleston.  Besides our normal itinerary of Ft. Sumter, the USS Yorktown (CV-10), Charles Town Landing, etc. we also visited the CSS Hunley.  I have not been for about 5 years and I am very impressed with the progress that has been made in restoration.  All of the hardened silt has been removed from the interior and it is looking great!  If you are ever in Charleston, SC, it is worth a visit.

I only managed to snap a few pictures, as I was shepherding nine 8th grade boys, but the boat is looking good:


I had a great group this year with some very smart, inquisitive, and well-behaved kids.  Thanks to my wife for bringing me along every year, as it gives me a captive audience to ramble on about history.

We took today as a recovery day, but I did dust off my One-Hour Wargames modifications for the AWI and tried them out on a hex grid.  They worked pretty well, I need to exercise them before.  I have not played them in so long, I am not sure why I changed the sequence from Move and Shoot to Shoot and Move, I might revisit that.

Here is a rough overview of the game.  I used my AWI Southern Campaign Army generator and the Damned Rebels fielded Militia plus some riflemen and the British sported Regulars with a battalion of lights, Hessian Jaegers, and 17th Dragoons.
(Click Photos to enlarge)

Here was the initial deployment:


The British tried to use the Light Bobs to clear the woods on the Patriot left flank with the bayonet, but the riflemen put up a stiff resistance in a bitter struggle that actually lasted most of the game.


The Jaegers dueled with their American counterparts on the other flank and gained the upper hand in the firefight.  The Backcountry riflemen decided to fight another day.  Meanwhile, the Regulars in the center charged up the hill at the main body of Patriot Militia.

With predictable results, the militia could not face the cold steel of the regulars and mostly quit the field. 

All in all a fun little diversion this afternoon.  I need to exercise the rules some more, the hexes certainly sped up play, but I need more games before I know how I feel about using them for linear warfare.

If anyone has any opinions on the Move - Shoot or Shoot - Move sequence, let me know.

Thanks and good gaming!

Monday, October 29, 2018

Orienting hexes for Linear Warfare, opinions?

Contemplating my 4" hex grid cloth and trying to decide the best way to use it for linear warfare such as the AWI and Darke Ages.  The Portable Wargame recommends using squares for this purpose, but I have this great hex cloth I want to use!

So, anyone with hex grid miniature gaming have any advice?

I see two options, here are examples using my 6mm AWI troops.

Option 1: With the grain


Like this, but the disadvantage is that you cannot make a continuous line.


Option 2: Against the grain


This option was inspired by the excellent Tigers at Minsk rules by Norm at the outstanding Battlefields and Warriors blog.

I am going to modify my One Hour Wargame variant for the AWI to hexes and am experimenting with infantry units moving 1 hex per turn.   Melee only happens when you enter the opponent's hex.  So a British line advancing on a Patriot line would look like this:

Turn 1
Turn 2
Turn 3
In this scenario, assuming a musket range of 2 hexes, the Patriots get 2 shots off at the British, which is exactly what they get in the non-hex version.

But in principle, you can see how it would work.  I am leaning heavily towards this option.

Here is what moving and arcs of fire would look like, facing changes are done inside the hex at the start and or end of the move like in One Hour Wargame.  The black arrows show 1 hex movement and the red outline shows 2 hex range target hexes.


Opinions? Am I cracked?  Thanks for looking, good gaming!


Saturday, October 27, 2018

Frugal Forests for 3mm and 6mm

UPDATE: I found the source for this technique HERE and he does a much better job!

Pesky real life has been taking up my time, so I have not updated in several weeks, but I have been keeping a few hobby projects going in the background.

Inspired by The Portable Wargame, Developing the Portable Wargame, and One Hour Wargames, I have been making hex compatible terrain for use with my Cigar Box 4" hex grid mat.  One of the terrain feature you need in quantity is forests and as I will be playing with 6mm and 3mm figures, I turned to my trusty friend the grout sponge, which I have used before for making forests for 6mm.

You can see another method at the Storm of Steel Blog as well, but this is my cheap and fast method.

Disclaimer: I did NOT come up with this method, I saw it on a blog or forum somewhere and cannot remember the source.  If you originated this, please take credit!

Supplies

I used:

  • 4 x Tile Grout Sponges
  • 1 x Can Dark Green Spray Paint ( I used Rustoleum Camouflage Green)
  • 1 cheap acrylic craft paint in a lighter green
  • 1 cheap acrylic craft paint in an even lighter green
  • Wide Paint Brush
  • Good scissors
  • Needle nose pliers
  • A hex template if you are trying to make a hex shape


Step 1

I cut each sponge in half as they are pretty thick.  I then use a plastic 4" hex I bought off of Amazon (I think quilters use them), but any hex template will do, and cut the sponges into rough hexes.  You do not have to be precise as you want them slightly irregular.

I managed to get 4 hexes from each sponge.


Step 2

This gets a little messy.  First I used the scissors to shape the edges off of the pieces and then I used the needle nose pliers to pluck out chunks of foam to give each piece a more irregular forest like appearance.  Remember you are making forests, not trees.

Do this somewhere you can clean up easily, as it generates a lot of little pieces of sponge.

Step 3

Spray paint the pieces.  I mean really get in close and spray paint the heck out of them.  I did 2 coats, as the pieces soak up the paint, well, like a sponge.  Let dry thoroughly.


Step 4

Heavily damp brush your darker green craft paint on first and let it dry, I used this:

Then dry brush on your lighter green.  Use whatever shades you prefer and dry brush to taste, I used this:


Let dry! Then the pieces are ready to use and are darned near indestructible.  If not using hex terrain, you can do as I have done for my other games and make smaller or larger chunks as you see fit.

Here are some posed shots of the trees on my 4 inch hex cloth with 1/600 cold war vehicles from Pico Armor, mounted on 1.5" squares


 I hope this is helpful.  Meanwhile, I am working on a few odds and ends, including a historically accurate set of hex based rules for the Ruritanian-Elbonian War of 1925.   Until then, good gaming!

Sunday, December 3, 2017

AWI Campaign Game 1

Image result for tarleton attacked by dragoon


Apologies for taking a while to start fighting the campaign, but besides Thanksgiving, we also welcomed our first grandchild into the word! She is healthy and happy and I am of course planning to introduce her to gaming, although this week is probably a little early. Mom and Dad are doing fine and my wife spent the night to give them a night's sleep.Now on to the show...

My lovely and talented wife has pitched in to help with the campaign, and she divided the Patriot forces while I divided the British / Loyalists.

The first battle was between the detachments both armies sent west to the backcountry, the Order of Battle was:


Patriots


3 Leaders
Lee’s Legion Dragoons
Lee’s Legion light Infantry (Skirmishers)
1st VA Continentals
2nd VA Continental’s
1 x Artillery
5 militia
1 Riflemen


British / Loyalist


3 Leaders
2 x British Legion Dragoons
2 x Combined Light Infantry (Aggressive Elite, Skirmishers)
British Legion Infantry
7th Foot
Jaegers (Elite, Skirmishers, Rifles)

We used the latest incarnation of my OHW House rules found here.


The Battle

I randomly selected a map from Neil Thomas's One Hour Wargames scenarios and rolled up a river crossing.  For narrative purposes, Morgan's plan is not to fight with a river at his back, but to wait on the other side and defeat Tarleton in detail as they crossed.

Here Morgan ponders his / her plans. 

 As Tarleton, my plan was based on shock action, I would personally lead my Dragoons across the bridge and disperse the militia, leaving room for the rest of my troops to cross and deploy.
I managed to steamroller one militia unit, but the beautiful General Morgan reoriented her forces to contain me and I did not have enough space to bring more troops across.

 Here we have the Rebels pouring fire into the brave British Legion dragoons while the British Legion foot prepares to cross and support them.  The lights fire across the river sporadically.


Here we have the climax of the battle.  The Dragoons and Legion infantry that crossed the river are annihilated by concentrated Rebel fire.  Tarleton killed (unknown whether during or after the battle...)  

With reports that Tarleton was hor de combat, Major Newmarsh of the 7th foot takes command and calls off the attack.  The British fall back and prepare to regroup with Cornwallis' main army.

After Action Review

My Take on Events:

From a campaign standpoint, the British have permanently lost half of the British Legion Dragoons and all of the British Legion foot, as well as Tarleton himself.  On the other hand, it was not nearly the disaster of the actual Battle of Cowpens, where Tarleton lost his entire command.

From a rules standpoint, we have not played these in a while and it took a little while for both of us to get back up to speed.  The next game between the main armies will be an open field battle and should be interesting, with more room to maneuver. 

Jozi's Take on Events:

As a relative newbie to the wargaming life, I will have to say that I was a bit frustrated with the whole bridge thing. Not only did the bridge limit strategy, but the troop abilities also limited setup choice.Take, for instance, I had 5 units of really lousy militia with a firing capability of two base widths. Great range, but the troop's firepower was limited by 1/2 when compared to everything else on the table. So, I ended up seeing the militia as war fodder as I immediately lost two entire units to the British Calvary. 

Being a very big poor sport, I got pissy and pulled back all of the "good troops" in my mental attempt to start over again (British set me up). This big baby move actually proved to be a good idea. 

Having cleared the field a bit, I then moved everything that I felt was "fodder" in direct line with that darn bridge. This included the cannon, which I quickly fell in love with. After a few lucky rolls and some aggressive rallying of the troops (to clear up some hits), the British began a running! 

Working with newbies or your wife, keep in mind a few things:
Tip #1 Always be clear when asked a question. When asked if my riflemen were safer in the treeline or pulled back, the British cunningly said "Oh yeah! They are untouchable in the treeline." Not true, if you roll a 6. 
Tip#2 Never set up newbies, or your wife's, men. No need to say more on this.
Tip#3 Keep scenarios simple.
Tip#4 Run through some open field practice games. 
Tip#5 Keep the newbie focused on using the quick reference sheet. That way the seasoned gamer is a bit less responsible for all the other person's bad die rolls and strategy errors.

Friday, July 7, 2017

OHW: Celebrating Independence in 6mm

Been offline for a few weeks, which included a great cruise with my lovely wife and daughter.  We had a spectacular time and I would not trade it for anything in the world.  Only item of wargaming significance was a trip to the WW2 Museum in New Orleans.  It is well worth a visit, we only had a few hours, but I suggest planning a day.

I also finished reading A Rifleman Went to War, highly suggested for anyone interested in WW1 or marksmanship in general.

Best news is I HAVE THE BEST WIFE EVER!!!  She has arranged a weekend trip to Historicon.  I won't be able to take off any days from work, but will be able to game my little heart out on Saturday.

I have continued to fiddle with One Hour Wargames for the AWI, even while I was on vacation.  I have made a few amendments to my house rules, see v6 of the QRS at the OHW link on the right.  I significantly modified the firing rules so that each unit only has 3 hits and does not clutter the table with casualty dice.  I shamelessly pulled all of the ideas from this excellent blog, thanks, John!  As you can see, I chose the "More Chaos" option.

Please give me any feedback you have on the rules.  The last set of tweaks I am thinking of to give more of an AWI flavor are somewhat inspired by Ruse De Guerre and include:

  • Allowing non-skirmishers to pass through each other, but the stationary unit may not move and takes 1 hit (or rolls to take a hit) to represent disorder, but the looser formations.
  • Also to represent the looser infantry formations and frequent rough terrain, allow non-skirmish infantry to move through woods, but only fire with 1d6 and melee with 1d6.  Or maybe take a hit if they move into the woods?
Thoughts?

Meanwhile, here are a couple of quick games I played.  The first was on the third of July, solo just to try out the new firing rules.  I am rather pleased with how it worked and the table looked MUCH less cluttered without the casualty dice.

Click on photos to enlarge

 British approach the Patriot line
Closeup of the Volunteers of Ireland and the British Legion coming under fire 

 And the battle lines meet!
 The British Legion Infantry collapses
And here is my Impudent Mortal plastic dice tower in a felt lined tray.  Makes dice management less messy.


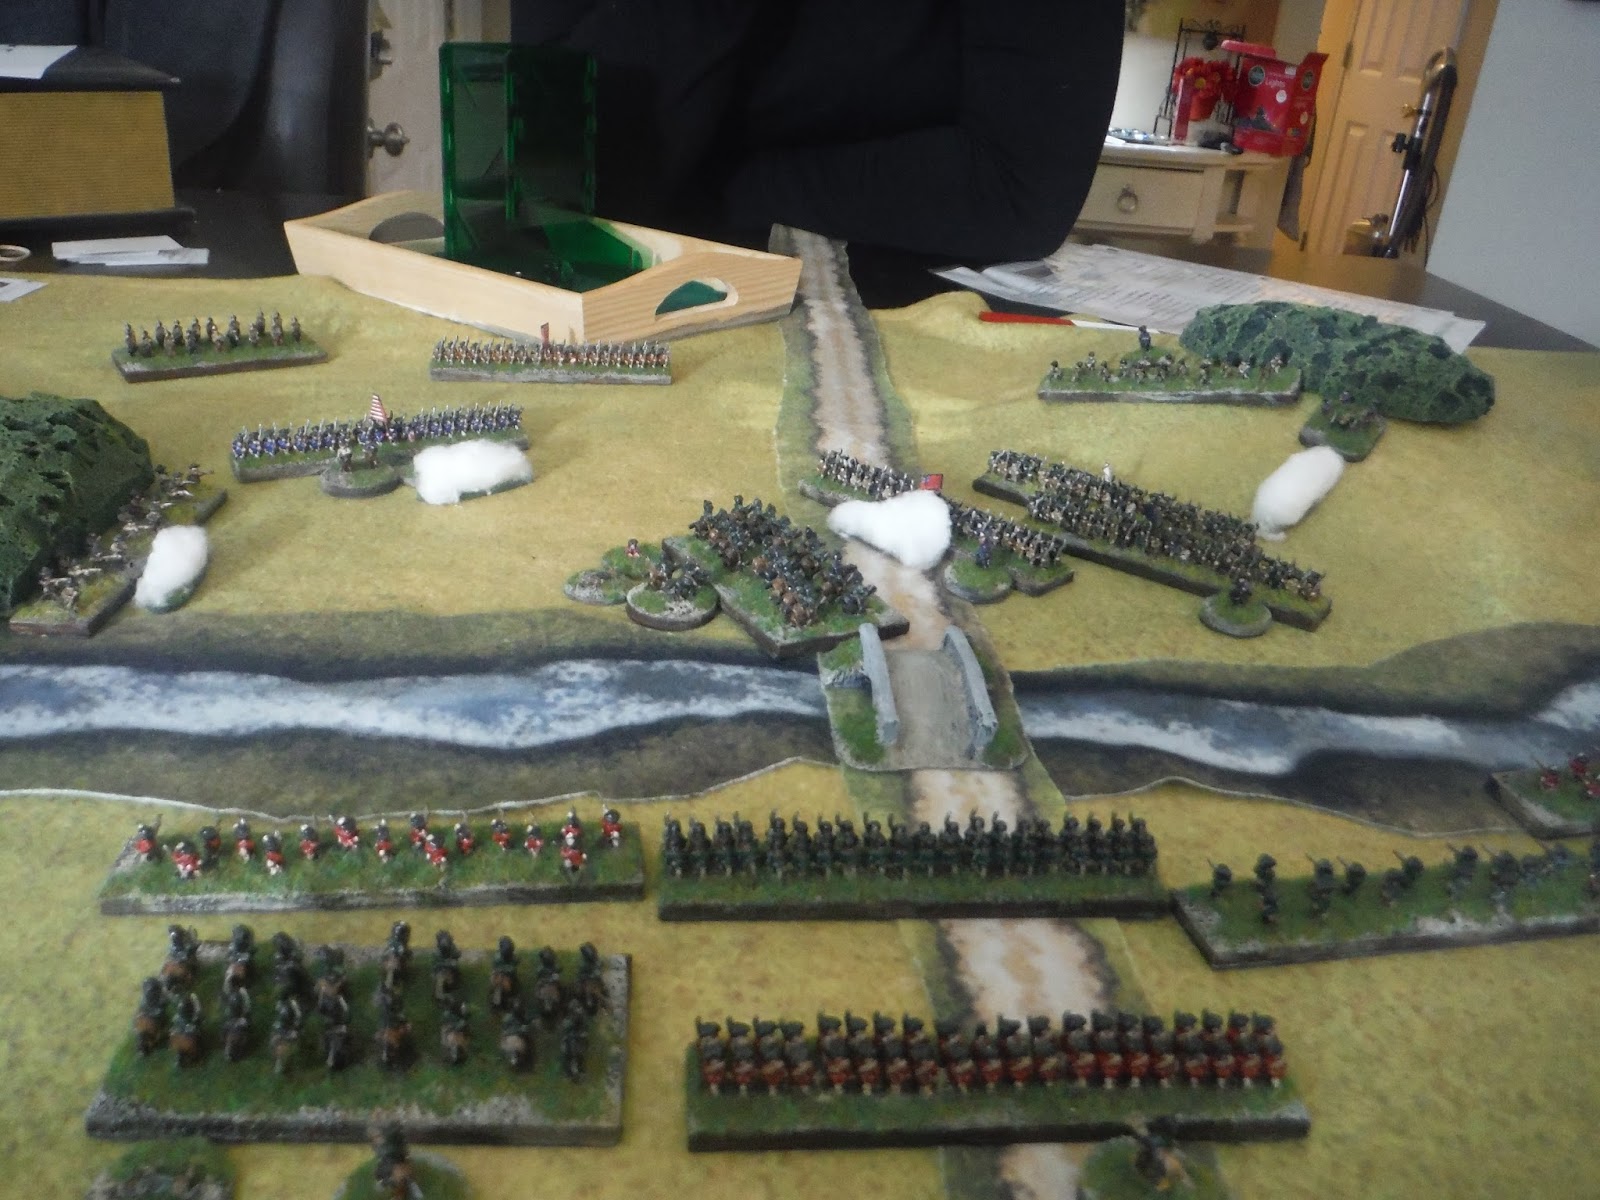
And here is a nice game I played this week with my lovely wife.  It is her first outing with the rules, she ran the British and I had the Patriots, who were trying to defend a ford.


Our dog, General Sherman, supervised operations:

The British General arrays her troops for battle
Here are a few shots of the game in progress.  I placed my militia up front, and the British eventually rolled me up and took the ford.


The victorious general basks in the glory of her victory!

The rules were a hit and she is onboard to play more games.  Sometime this weekend, I will probably post another updated QRS, and maybe get the SBCT back on the table.  Until then, good gaming!


Saturday, May 13, 2017

One Hour Wargames: Updated House Rules and Wietzel's Mill

This weekend, I played a nice AWI One Hour Wargames scenario using the latest incarnation of my AWI house rules.  I have posted a permanent link to the right to the latest incarnation.

I the spirit of C.S. Grant, I played a battle game based on the Battle of Weitzel's mill, which occurred about a week before Guilford Courthouse.  Think of it as a movie "based on actual events."  I identified what I thought the most important features were and designed a scenario around that, rather than trying to do a strictly accurate recreation of the battle.  the key points are:

  • The Crown forces are pursuing Colonel Otho Williams and the Continental Light Corps with the intention of catching up to Greene's main force and bringing it to battle.
  • The Continental forces consists of light troops and militia
  • The Crown forces are the cream of the crop available to Cornwallis.
  • There is a contested river crossing, with the Patriots fighting a delaying action.
  • The British objective is to exit the road on the NE by turn 15.
Crown Forces:


  • 3 x Leaders (Cornwallis, Tarleton, Webster)
  • 2 x British Legion Dragoons 
  • 1 x Light Infantry (Elite, Aggressive)
  • 23rd Foot (Elite, Aggressive)
  • 71st Highlanders (Elite, Aggressive)
  • Von Bose Regiment (Elite, Aggressive)
  • Jaeger Detachment (Rifles)
Patriot Forces:
  • 3 x Leaders (Williams and 2 others)
  • 1 x Skirmishing Riflemen
  • Lee's Legion Dragoons
  • Lee's Legion Light Infantry
  • Continental Light Infantry
  • 2 x Militia (Poor troops)

Click on photos to enlarge, here is how it played out.

This is the initial setup.  The key terrain feature is the river, which can only be crossed at the bridge and the mill itself, which is made of stone and provides hard cover.  The Patriot plan (as historically) was to delay with the riflemen and Dragoons and then contest the crossing.


 The British commander created a traffic jam by a poorly chosen march order for his troops, leading with the dragoons. They tried charging the riflemen on the hill and were repulsed a couple of times.  The main effect was Tarleton was rendered hors de combat while trying to rally his horsemen for another charge.

 By turn 4 (as can be seen on my home made turn counter), Cornwallis had sent the Lights around the left flank and Jaegers around the right of the Rebels... 
 ... and the Light Bobs delivered a devastating charge the swept the riflemen from the field, unfortunately most fled to fight another day.

This reverse must have been visible to the Militia covering the bridge because the next patriot turn this Fog of War card came up.


Lee's Legion dragoons charged the Jaegers but failed to do much damage, and the net turn, the British Legion, probably enraged that their commander was unhorsed, savagely charged into the flank of Lee's Legion and drove them from the field. 
Some desultory fire was exchanged across the river, but Lieutenant Colonel Webster saw his chance and with his usual daring and pluck led the 71st Highlanders across the bridge before the Militia can block it. 
 The 71st Highlanders crash into the hapless militia.


 The militia rout from the field.  Meanwhile the Hessians wheel left and the 23rd foot wheel right to clear the rebels from the vicinity of the bridge.
By the end of turn 11, the Hessians have scattered the Continental lights and the British Legion have ridden down the last militia unit.  The remaining men of Lee's Legion occupying the mill decide enough is enough and withdraw to fight another day.

The Crown forces had won, but taken more irreplaceable casualties, while the scattered Patriot formations would reform,  All of the participants would meet again in a week's time at a place called Guilford Courthouse.

An excellent little solo game, I really enjoyed the drama added by the Fog of War cards.  I hope you enjoy it and the latest incarnation of my house rules.