Search This Blog

Showing posts with label Brigade Commander. Show all posts

Tuesday, May 5, 2015

Brigade Commander Game 3 (and Terra Blocks and Painting)

Mrs. Tin Man and I have been busy getting ready for her oldest's wedding this month, but I did manage to get a little gaming in this past weekend.

First up, I took the plunge and purchased a deluxe starter set of Terrablocks from Sally 4th.  I plan to use them as interiors for pulp games, spaceships, dungeons, or just about anything else.  They are very versatile and I cannot recommend them enough.  It only took me about an hour to glue them all together, and I think they will get a lot of use on my table.

So... I decided I needed some interior furniture and decided the most cost effective way was to go with 1/48 scale doll house furniture, and I picked up a pack for $9.99! It turned out well, and i think I will pursue this avenue going forward.

Now Mrs. Tin Man contends that I have crossed a line and am now officially playing with dolls.  My response: "They're ACTION FIGURES!!!"  Opinions?

I did take inordinate fondness in setting up the tableau below, and I am looking forward to setting up my Hercules Poirot Dream House.

Here are the Terrablock pieces left over from above, as you can see, you get quit a lot in the deluz starter set.


Now on with the battle report...

2nd Brigade / 6th Armored Division
CENTAG: 1985, Game 3

Just to catch you up, I am playing all of these games with 5Core Brigade Commander.

  • TF 1-44 Armor: 3 x M-1 Companies
  • TF 3-44 Armor: 2 x M-1 Companies, 1 x M113 Mech Company, 1 x ITV Company
  • TF 2-93 Infantry (Mech): 2 x M113 Companies, 1 x M-1 Company
  • Attachments
    • 2 x M163 Vulcan Platoons
    • 2 x Stinger sections
    • 1 AH-1G Platoon from Division aviation
Here you can see the Brigades initial dispositions, with two battalions forward and 1-44 acting as a reserve for a mobile defense.
And here are the assets assigned for this battle
The Soviet Regiment took some damage in the last engagement, but the 205th MRD commander has reinforced it with the division reserve tank battalion in the hopes of making a breakthrough.  Here you can see the Soviets on the line of departure
  

And here are the Soviet assets.  Mouting the cards on the floor tile worked for a while, but they are getting worn fast, so next time I print them I will laminate them.
Higher echelons have also assigned Mi-24 Hind attack helicopters from Front aviation assets to assist in the breakthrough (making their on table debut!)
Here you can see my new and improved forest sections for 3mm and 6mm.  I based them on 2" hexagonsso units can fit in them, I just need t finish flocking them!  You can also see my new "Taking Cover" markers for units hiding in terrain.
These are teh Soviet initial dispositions and maneuver plan.  In retrospect, not as good as the last game's plan.
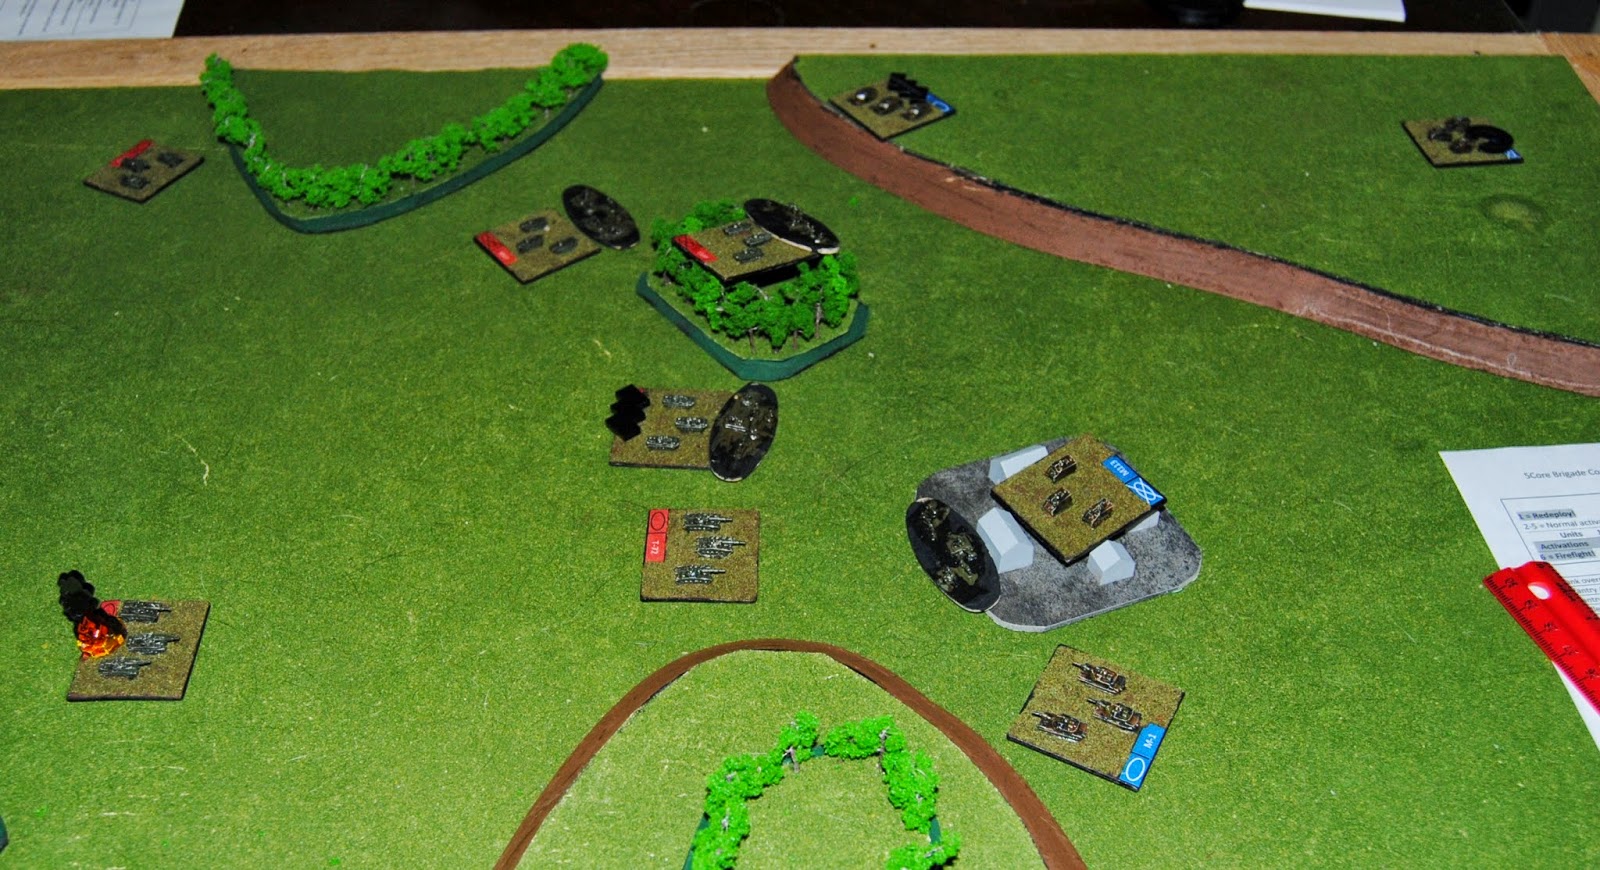
The two battalions rolling up the center took a pounding from artillery and air strikes.  Here you can see an A-10 rolling in hot firing an AGM-65.
The Soviet right flank was stopped cold, with the left flank slowly closing in on it's objective.  The center turned into a serious slogging match, but it helped the Soviets that they rolled 2 "scurry" turns in a row!
Here an SU-25 tries to repay the compliment, but it was driven off by the stinger team.
More carnage in the center as the Hinds re-position to support the assault by fire.
2nd Brigade managed knock gut the assault on the center with some casualties.
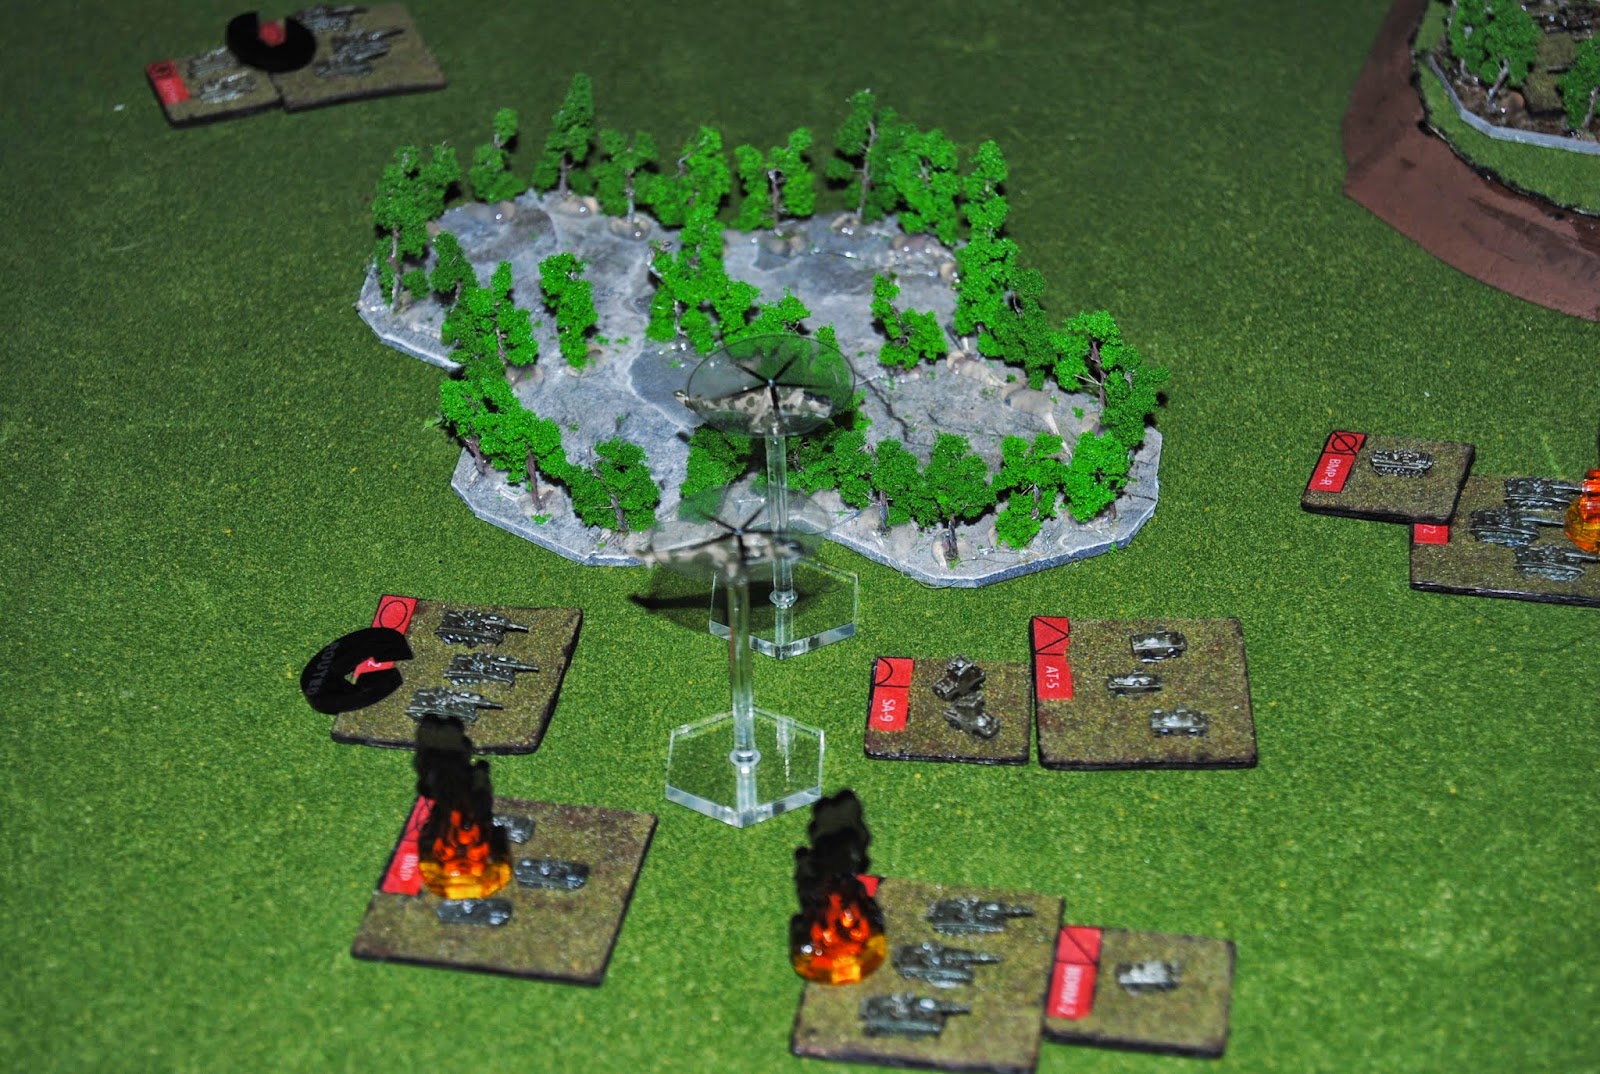
The Soviet left flank bogged down in the town, but managed to render the ITV company cobat ineffective.  Then the Hinds rolled in and killed both M-1 COmpanies on the high ground outside of the town!
By this time, the Soviet attack was stalled.  The final butcher's bill was:
  • Soviet Losses:5 x T-72 companies, 3 x BMP Companies
  • 2nd Brigade losses: 3 x M-1 Companies, 1 x M901 Company, 1 x Scout Platoon
Rolling for losses and seeing if the casualties from game 2 would make it back:
  • C/3-44 Armor: Still refitting
  • B/2-93 Mech: Still refitting
  • B/3-44 Armor: Refitting in rear, not available next game
  • D/1-44 Armor: Combat ineffective, survivors dispersed as replacements to rest of Brigade
  • C/1-44 Armor: Refitting in rear, not available next game
  • E/2-93 Infantry(ITV): Rallied, available for next game.
  • 2-93 Mech Scout Platoon: Rallied, available for next game.

So for the next game, 2nd Brigade will have a total of
  • 4 x M-1 Companies
  • 3 x M-113 Companies
  • 3 x M3 CFV Scout Platoons
Stay tuned for the next game.  Meanwhile, here are some random 28mm figures I painted the last couple of weeks waiting to get a shot of matte sealer and basing done.  As you can see, I suffer from the magpie syndrome.  Until next time, roll high and live!


Saturday, March 21, 2015

CENTAG, August 1985 : BC Campaign Game 2

This is game #2 of my 5 Core Brigade Commander 1985 campaign.

Probably will not get another game in this weekend, as we have family in town and I am in the midst of updating some of my terrain.  Meanwhile, here is the second game from last weekend.  As always, click photos to enlarge.


The Soviet Motor Rifle Regiment (BMP) deploys on the line of departure, with the goal of
penetrating the NATO defense for follow on forces.

2nd Brigade deploys into defensive positions.  The Brigade CO has cross attached companies to create 3 mixed battalion task forces, deploying them 2 up, 1 task force in reserve.  The Brigade's mission is to prevent the Warsaw pact from moving through the gap at the Western edge of the table.

Here are the initial moves of the MRR, with the planned axis of advance.

Initial contact results in the Soviet left flank MRB taking a beating from artillery and the other two taking damage from direct fire, but they drive 3-44 Armor off of their forward position.  Worse for nd Brigade, one of 3-44's armor companies is hit by a battalion of 152mm guns and rendered combat ineffective.

The Soviet lead element continue to advance as planned, while TF 2-93 launches a counter attack on the other flank.  The Soviet commander brings up the regimental anti-tank company to protect the flank, and drives off the initial thrust.

2/93 continues to try to make headway, but the massed ATGM fires from the MRB hold them off.  On teh other flank, the Soviet lead elements continue to advance and destroy the Mech Infantry Company attached to 3-44 before being driven back by a counter attach, supported by elements of TF 1-44.

Here we are at the then of the game.  TF 2-93 counter attack has faltered, and 3-44 has lost 3 out of 4 combat companies.  The 2nd Brigade commander, with his northern flank in ruins, decides to fall back to more prepared positions to the rear.

After the game, I rolled on the recovery table for every destroyed company.  For 2nd Brigade, this results in A Co., 3-44 Armor having be destroyed and the survivors have been dispersed as replacements throughout the rest of the Brigade. C / 3-44 Armor and B/ 2-93 Inf both will not be available for the next engagement.  I will roll for them again after the next battle and see if the forward support battalion was able to get them sorted, instead of automatically making them availible again.

The Soviets lost 1 Tank Company and 2 BMP Companies.  After rolling, the Tank Company is back in action and the two BMP companies are permanently destroyed.  I am assuming for the Soviets that if a company does not roll an immediate back in action, they are destroyed, as they plave less emphasis on battlefield repair and recovery.

The next game will see the MRR continuing its attack.  The Division commander decides to reinforce it with the Division reserve tank battalion ad attack helicopters, to hopefully force a breakthrough that the Tank Regiment can be unleashed through.

Stay tuned, and happy gaming!

Tuesday, March 17, 2015

Brigade Commander Asset Cards

I have post my asset cards, in .docx and .pdf format, along with my idiosyncratic quick deference sheets here:

Brigade Commander QRS and Asset Cards


Enjoy!

Still have game 2 to post and preparing for game 3 (hint: I just finished painting two Mi-24 Hinds.)

Sunday, March 15, 2015

CENTAG, August 1985 : BC Campaign Game 1

Started my campaign Saturday and got two games in!  First some background.

I will be following the fictional 2nd Brigade, 6th Armored Division.  The division forms part of the US V Corps, and is in the process of completing implementation of the Division '86 reorganization. All subordinate units have reorganized to the new H series MTOE, but only 2 of the 4 infantry battalions have upgraded from M-113 to M-2 Bradley's.

The Warsaw Pact has launched a short notice assault across the Inter-German border, after a few weeks of escalating tensions for the stated purpose of liberating the FRG from fascism.  The Soviets have announced that they will not use chemical or nuclear weapons and they intend to stop at the Rhine River.

At the outbreak of hostilities, the division's front is covered by elements of the Corps Armored Cavalry Regiment.

2nd Brigade consists of:
  • 1/44 Armor
  • 3/44 Armor
  • 2/93 Infantry (Mech)
  • 1/198 Artillery (direct support from DIVARTY)
2/93 is equipped with M-113, the two armor battalions with M-1's (105mm)

As the Brigade scrambles to roll out of their motor pools, the ACR if engaging lead elements of the 205th Motor Rifle Division...

Game 1: Screening Mission

3/44 Armor has been given the mission to rush to meet the Soviet spearhead and act as a screening force to give time for the rest of the Brigade to form up.  They are to perform a mobile defense / delay in sector.  They have two flights of AH-1 Cobras from the division Aviation Brigade as well as some close air support and 1/198 FA firing in direct support. (Click photos to enlarge)
Here we see 3/44 Armor forming up.

The lead elements of the 205th Motor Rifle Division have rushed passed the Armored Cavalry units on the border and are moving towards 3/44 Armor's position.  Their orders are to identify enemy position, and bypass resistance encountered.  f they are unable to bypass, they will hold in place and wait for the rest of the lead Motor Rifle Regiment to arrive and perform a regimental attack.

The Soviet forces consist of the Division Forward Detachment (at top of photo) consisting of the Division recon battalion, 1 tank company, and 1 Motor Rifle Company (BMP), reinforced with a platoon of ZSU-23-4.  Immediately behind the lead battalion of the motor rifle regiment.  They are reinforced by a battalion of 122mm guns in direct support, Front Aviation close sir support, and Radio Electronic Combat support (jammers.)

Lead elements forming up for the attack.


Here we have the initial dispositions.

And the Soviets rolled a "Scurry" on their first turn.

The 3/44 calls in an airstrike (A-10 is not painted yet!) seriously disrupting the MRB.

Meanwhile the division forward detachment presses on, and drives one M-1 Company out of it's position.

Accurate Fire from the M-1's destroy the lead company.

And after some exchange of fire, the Cobras swoop in and destroy the rest of the division forward detachment.


At this point the Division Forward detachment was in shambles and the lead MRB was significantly disrupted and disorgamized.  The Regimental commander radioed forward for the battalion to reorganize in place while the rest of the regiment moved up in order to launch an attack from the march.

Meanwhile the rest of 2nd Brigade was pulling into position, 3/44 had accomplished its mission.

This game took 30 minutes, which left me time to play the next game, which I will post soon.

In the photos, you can see the asset cards I made with MS Word, printed, and mounted on floor tiles.

Next time, the full Motor Rifle Regiment assault on the Brigade's sector!

Tuesday, March 3, 2015

Brigade Commander, yet another play test

I ran another play test this time on a larger table, 3′ x 4′ attacking down the length.  The Warsaw Pact had a Motorized Rifle Regiment (BMP)  with the trimmings (full strength, air defense company, Recon company, Regimental Artillery group) with persistent off board artillery stonks available (152mm battalion attached from division)  I also gave them 1 activation for every 4 units
The Americans had a small Brigade with an armor battalion (4 x m-1 with 1 x recon attachment) and a mechanized infantry battalion (3 x M113 Infantry, 1 x recon attachment, and 1 x M901 ITV.) Also had a platoon of AH-1 gunships attached from division and a persistent off board stonk (155mm guns from DIVARTY) and I gave them 1 activation for every 3 units.
For my feedback on the rules, see the discussion thread at The Wargames Website.
You can see from the pictures below, the larger table allowed more maneuver and the troop density seemed right. The MRR was attacking on a 3km frontage, which is correct per doctrine.

Click photos to enlarge.

The Soviets are advancing to seize the town and gap on the west end of the table.
The MRR on the line of departure. At the top you can see the Regimental advanced detachment consisting of 1 Tank company, 1 motor rifle company, the recon company, reinforced by a battery of 122mm SP guns.

Here is the NATO defense.

The Soviets push through on their left flank.

The end of the game, the Soviet spearhead runs out of steam just short of the objective.

The remnants of the Motor Rifle Regiment.
The NATO survivors... next game I may see how they fair against the follow on Tank Regiment.

The game lasted right at an hour.  For the sharp eyed, i did use an OH-58 to fill in for gunships.  These are going to be a great set of rules, and i look forward to the final vrsion coming out.


Saturday, February 28, 2015

Brigade Commander Play test - version 0.05

For the record, I have the BEST wife in the world.  Over morning coffee, we played a quick game of Brigade Commander version 0.05.

Mrs. Tin Man had a small soviet force of 3 x T-72 companies, and 3 x BMP companies.  Their objective was to seize a town in a gap so that follow on forces could pass through.  I defended with a battalion task force consisting of 2 x M-1 companies and 2 x M-113 companies.

This is the debut of my infantry stands, although I need to flock them still.  I use them to indicate "ready" mechanized infantry or leg infantry.  I'll do some closeups and an explanation why I picked that unusual shape in a future post.

We played the rules as written, and I think the worked really well.  I am starting to get over my ATGM phobia and I think the rules as written handle it nicely.

My only rules recommendation is to update the assault combat factors to match Company Commander so Pinned units are at -1 and Damaged units at -2.

Here we see the Soviets rolling across the line of departure towards their objective.  Mrs. Tin Man rolled a Scurry for he first activation.

We had some significant exchanges of fire the first few turns, and I managed to knock out one of her T-72 companies.

And here I am rolling dice and placing disorder markers on my guys.  She was able to drive back one of my M-1 Companies and force the Infantry Company in the small wood to fall back.  

My wily opponent then occupied the wood with a BMP company...

 ... and began to pour fire into the infantry company occupying the town, damaging it ("Man Down" result")...
... which was then followed up by a close assault by another BMP company.

At this point the defender had lost 1 infantry company and the other was almost routed off the table, so it made sense for the American Battalion commander to fall back and set up a new defense or (more likely under AirLand Battle doctrine) regroup and counterattack the follow on forces from the flank as they move through the gap.

Mrs. Tin Man enjoyed the game and is up for another!  Once she got the "look for 1's or 6's" mechanic it was easy.  Going to try again this weekend with the bigger table and a full MRR in the assault.

All in all, a great way to spend a Saturday morning!

If you are not familiar with the rules, you can find the play test version on The Wargames Website here.

Tuesday, February 24, 2015

Brigade Commander mechanics: I actually read the rules...

Been doing a little reading, first to brush up on how Soviet tactics might have played out on the battlefield.  I have never believed the old hordes of tanks myth, and I have been digging through FM 100-2-1 The Soviet Army Operations and Tactics, 1984, available at that link from the Federation of American Scientists.  Fascinating stuff, especially looking at Regiment and below.  

Not sure how much of this has been proved wrong by information gathered since the end of the Cold War, but I think it is a good resource.  I have been particularly looking at the chapter dealing with artillery tactics.

Also, after some correspondence with Ivan, I realized that I did not have a good enough grip on Company Commander to correctly play test Brigade Commander, so I did something out of character and actually READ the rules!

I discovered I was handling reaction fire incorrectly, so I did a few small run through just to make sure I was getting it correct.

Here is how I am marking combat die results using the excellent markers from Litko.  They have a wide variety to meet any taste, and I rather like them.


First off, I had to clear the cat from the table...
Run #1: M1 Company defending against T-72 battalion with attached BMP company
 

SOVIET TURN: The Soviet player activates and moves one T-72 company forward.  The M-1 Company fires guard fire, 1 Kill die, to no effect.  The T-72 Company fire 1 Kill / 1 Shock when it completes its move, scoring a 1.  The remaining companies roll forward, fire, but to no effect.
US TURN: The US player activates the M-1 Company and rolls a 3 on the kill die, which allows the unit to act normally this turn.  It immediately fires 1 Kill / 1 Shock, disrupting one of the tank companies.
 SOVIET TURN: The Soviet player activates the other tank company, which rolls forward a few inches and fires 1 Kill / 1 Shock and renders the M-1 Company combat ineffective.

Run #2: M901 ITV Company defending against T-72 battalion with attached BMP company

SOVIET TURN: The Soviet player activates his first tank company and moves into range of the ITV's.  Using the new optional ATGM rules:

  1. The ITV's declare fire against the T-72's
  2. The T-72's get to roll a kill die against the ITV's first, no effect
  3. The ITV's then roll their kill die, with no effect.
The next Tank company and BMP company roll forward in turn, the ITV's guard fire again, all to no effect.
 US TURN: The US player activates his company and fires at one of the tank companies again.

  1. The tank company gets 1K dies first, no effect
  2. The ITV fires 1K / 1S and scores a 6 on the kill die!
  3. The ITV company then withdraws directly to its rear

A few observations on Brigade commander now:

  • I like the optional ATGM rules and will continue to play with them.  IFV / ATGM companies with significant numbers of launchers should be able to KO a tank company, BUT getting into a toe to toe shootout is a bad idea if you don;t get them first shot. (or should that be TOW to TOW?  Get it... oh never mind.)
  • I think I am handling movement correctly, you either fire and move or move and fire. So a defender can take a shot and withdraw.
  • Not pictured here, I also fiddled with Recon over the weekend and I like the recon rules as written.  I did suggest some optional rules, but they really don't add anything to the basic structure.
I feel ready to do a full reset and run my bog standard MRR attack again.  But first, I have to get the cats off the table again and Mrs. Tin Man is painting.  Until then, good gaming!