Search This Blog

Sunday, February 24, 2019

Brief Intermission while I upgrade my terrain

I am going to focus on painting my Timecast roads and Brigade Models towns before my next game.  Don't worry, it will be Tank on Tank: Central Front.  If you have any ideas or suggestion son the rules, drop me a line and let me know.

Also, I added a section to the left listing the creative folks I support on Patreon, give them a look and see if they are worth supporting!


Saturday, February 23, 2019

Tank on Tank Central Front: The Bridgehead (The Game)

See my last post for the scenario details, here is how the game played out!
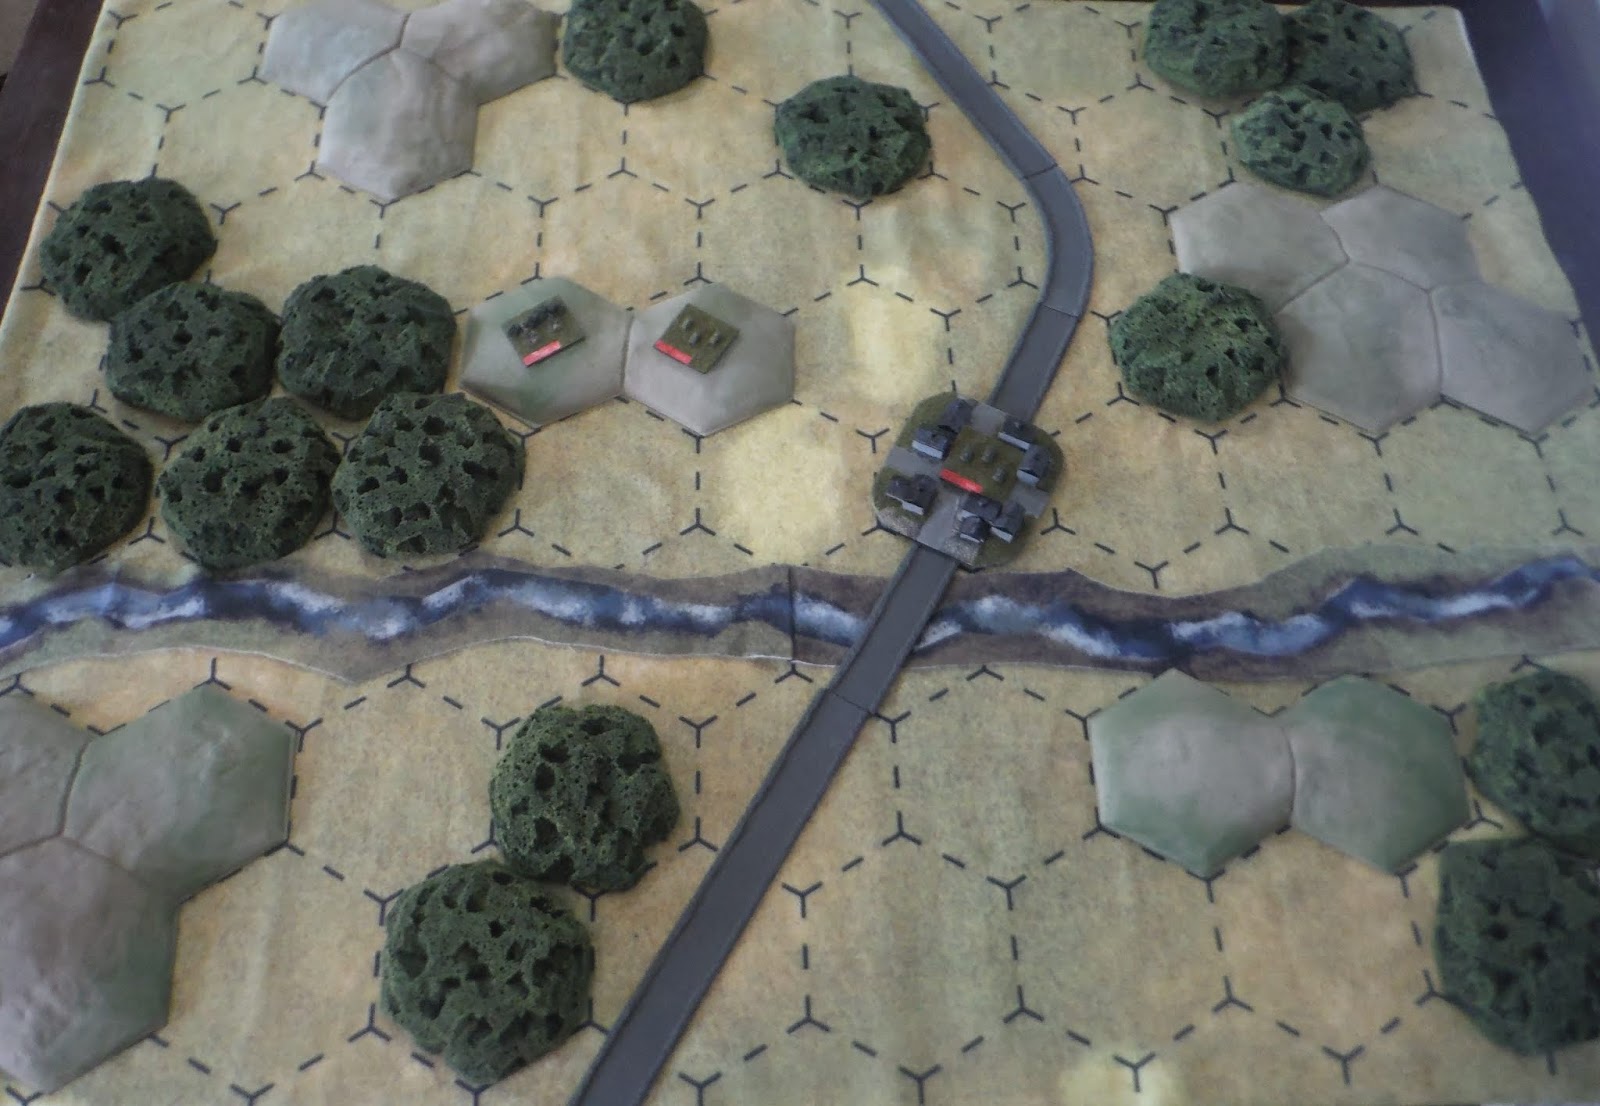
Click photos to enlarge

Turn 1

NATO Phase

Task Force 1/114 INF (TF Dagger) is the first unit from 3rd brigade to arrive and immediately attacks the BMP company holding the town, but with little effect.

Soviet Phase

The defenders in the town respond with a devastating volley of AT-3 Sagger missiles that knock an Infantry Company out of the fight.

Turn 2

NATO Phase

The rest of TF Dagger shifts to take cover and engages the Anti-Tank Company on the high ground west of the town.   The BDRM-3's had not had time to prepare defensive positions and the M1's were able to eliminate them as a threat.

Soviet Phase

The first battalion from the 364th Guards Tank Regiment arrives to reinforce the bridgehead, accompanied by a section of Mi-24D Hind attack helicopters.  The Hinds unsuccessfully engage the tanks of TF Dagger with missiles.

Turn 3

NATO Phase

The action intensifies, from left top right:
  • TF Dagger eliminates the 100mm anti-Tank gun battery remaining on the high ground west of town as a threat.
  • A-10's roll in on the Tank Battalion crossing the bridge.  They should be sitting ducks... yet the strike is completely ineffective. (they rolled a 3, maybe they were worried about MiG's off table or SA-7's from the BMP company drove them off.)
  • The Stinger section unsuccessfully attacks the Soviet attack helicopters
  • TF 3/313 (TF Saber)  Armor arrives in the area

Soviet Phase

The 1st Tank Battalion deploys, reinforcing the town and swinging west to engage ineffectively the M1's in the woods.  The Attack Helicopter redeploy to face the new threat from TF Saber and knock a company of M1's out of the fight. (You can also see the Regimental Artillery Group in the lower left corner)

Turn 4

NATO Phase and Soviet Phase

TF Saber takes cover in the woods, intending to use it as a jumping off point for an attack on the town.  TF Dagger destroys the tank company west of the town.

The Soviets respond with ineffective air strikes and helicopter attacks against TF Saber while the 2nd Tank Battalion arrives along with a battalion of 152mm SP guns in support.

Turn 5

NATO Phase

A lull in the fighting this turn, but you can see TF 2/114 INF (TF Hammer) arriving in the upper left-hand corner.

Soviet Phase

2nd Battalion deploys on the high ground west of the town and brings the M1's to their front under fire, but to no great effect.

Turn 6

NATO Phase and Soviet Phase

TF Hammer moves into the woods west of town, while it's Anti-Tank Company eliminates the BMP-R platoon on the high ground so that it cannot interfere with this maneuver.

Both sides exchange ineffective fire, including the Hind Section that attempts to work behind TF Saber.  3rd Battalion of 364th GTR arrives to reinforce the bridgehead.

Turn 7

NATO Phase and Soviet Phase

The long awaited support from the Division Aviation Brigade finally arrives and quickly dispatches the Mi-24D Hind flight.

3rd battalion of the 364th GTR deploys west of town to counter the threat from TF Hammer and add to the fires from the units on the high ground concentrating on the M1's of TF Dagger, which is knocked out of the fight.

Turn 8

NATO Phase and Soviet Phase

TF Hammer Attacks and knocks out a BMP company on the flank while sporadic firing occurs around the rest of the battlefield.

Turn 9

NATO Phase and Soviet Phase

 TF Saber launches an unsuccessful attack on the east side of the town.

Turn 10

NATO Phase

 Things heat up, with the Cobras starting to take a toll on the Soviet armor, TF Saber's Mech Infantry Company is knocked out of action, TF Hammer moves into position to assault the west side of town.  One of the defending BMP companies is eliminated.

Soviet Phase

In a desperation move, the last company of T-72's deploys from the high ground to counter-attack.

Turn 11

NATO Phase

The final turn.  The Cobras fire TOW's into the rear of the T-72 Company, eliminating it as a threat and TF Hammer barely manages to push it's way into the town, cutting off the Soviet Bridgehead.


A very fun game, here are a few random observations:
  • The piecemeal arrival of troops on both sides made the game fun and challenging
  • Casualties were high (even assuming that a "destroyed" company is just combat ineffective for this battle.  But, I would expect that for this kind of action, with the action around a fixed terrain point.  Plus the frontage for the main fighting was around 10-12 km, so feels about right to me.
  • I have updated the rules (see link to the right) to include logistics packages and give units the option to go hull down on hills (which would have made the blocking force more survivable.)
The scenario itself was great and was I think the key component fo the game.

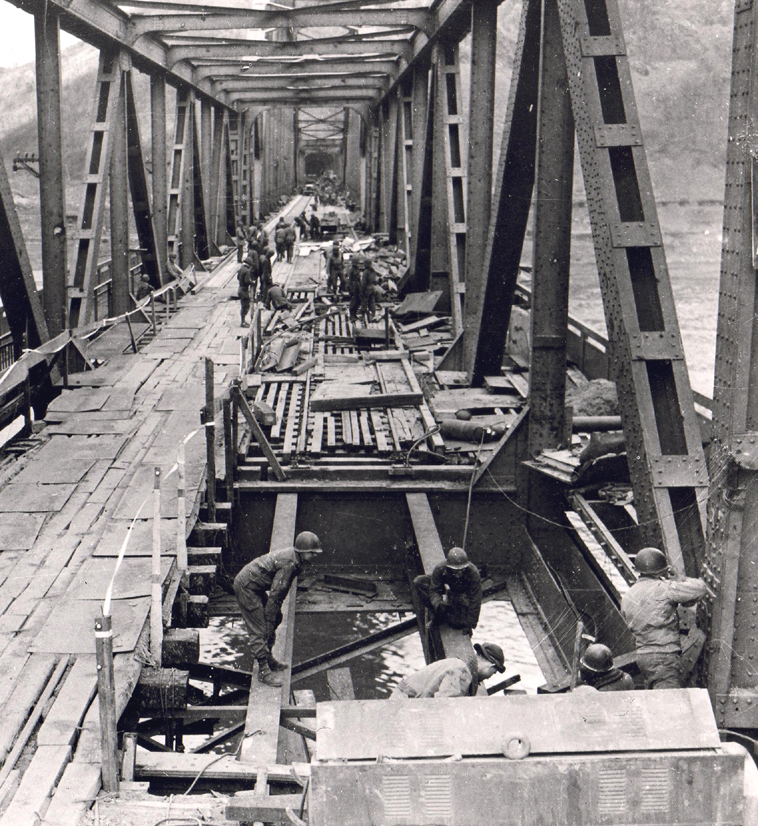
All in all a NATO hard-won victory.  6th Armored Division is no longer threatened on its flank and a Soviet Tank Regiment was destroyed, but with significant losses.   All for the failure of a detonator to destroy the bridge.

This game was so much fun, I am going to skip the game decider and put soem more Tank on Tank Central Front onb the table until I weary of it and then back to the game decider.  I hope you enjoyed this battle report, good gaming!

Saturday, February 16, 2019

Tank on Tank Central Front : The Bridgehead (The Scenario)

I can not remember who said it, but one fo our wargaming forefathers said in one of his books that gaming "off the table" can add quite a bit to our tabletop encounters.  I believe this is especially true for solo gaming.  So, I will take a little space to walk through how I set up the game and the scenario.

Selecting the Scenario and Forces

So the first roll on my random Game Decider came up a 1, Tank on Tank: Central Front.  To select the scenario, I randomly selected from the scenarios in One-Hour Wargames and rolled a 5, Bridgehead.

I will not reproduce the entire scenario from the book (buy the book!) but here is a summary of the situation:

Given I am playing the Central Front circa 1985, I chose to make NATO the "Red" side and the Soviets "Blue."


  • To generate the forces, I use Ivan Sorensen's table from FiveCore Brigade Commander, an excellent set of rules at the same scale, 1 base = 1 company. They are only $9.99 and packed with useful stuff beyond the rules, which are excellent.  I used the Army Generator on page 51, combined with my own impeccable (?) military judgment and my knowledge of TOE's of the period.


First I rolled to see what sort of force each side would have and I named my overall forces to help immerse me in the game.  I rolled:


  • US Army 3rd Brigade / 6th Armored Division: (Hereafter 3rd Brigade)
    • 43 = An Infantry Brigade
  • Soviet 364th Guard Tank Regiment: (Hereafter 364th GTR)
    • 88 = An Armored Brigade

Next is to see how many "Main" troop types I will have. The tables assume a 9 company Regiment so I will tweak a little as both units would be organically combined arms. This is fine, as Ivan encourages you to use his rules as a toolbox.  I decide that 3rd Brigade is "stretched" as it is being hastily thrown into the fray and the 364th Guards TR is "average," as it has been in the second echelon and not suffered too badly yet.

I roll the dice and get:

  • 3rd Brigade
    • 33 = 5 Main
    • I interpret this to mean that 3rd brigade has 5 maneuver companies.  I organize them as:
      • 1/114 Infantry (Mech): 2 x M113 Companies
      • 2/114 Infantry (Mech): 2 x M113 Companies, 1 x M901 Anti-Tank Company
  • 364th Guards Tank Regiment
    • 58 = 7 Main
    • As in my organizations, a Tank regiment has 3 x battalions consisting of 2 x company size units, I interpret this to mean the unit is slightly under strength, so the Regiment will have 5 x T-72 companies split between its 3 battalions
Next is to roll for "Secondary" units
  • 3rd Brigade
    • 73 = 3 Secondary Units
    • I will make these armor, so 3rd Brigade has attached 3/313th Armor of 3 x M1 Tank Companies
  • 364th Guards Tank Regiment
    • 93 = 3 Secondary Units
    • The Regimental Motor Rifle Battalion is at full strength, with 3 x BMP Companies

I use the Attachments table next to see what each unit has besides maneuver units, with 3rd Brigade as "Well Equipped" and 364th GTR as "Moderately equipped"

  • 3rd Brigade
    • 36 = 3 Attachments
    • I select:
      • 1 x M3 Scout Platoon
      • 1 x Stinger SAM Section
      • 1 x AH-1 Section from the Division Aviation Brigade
  • 364th Guards Tank Regiment
    • 61 = 4 Attachments
    • I select:
      • 1 x Regimental Artillery Group (122mm SP Guns)
      • 1 x BMP-R Scout Platoon
      • 1 x Regimental Anti-Tank Company (AT-5)
      • 1 x Mi-24D Attack Helicopter section from Army Aviation
You can see the forces are starting to come together and as I go through the process, I am building a story for each unit in my head, that I will share at the wrap up at the end.  Next up is Fire Support using the "Packets" collumn and for each unit, I roll:
  • 3rd Brigade
    • 08 = Zero Artillery Support!
  • 364th Guards Tank Regiment
    • 18 = 1 Fire support
    • I select a Battalion of 152mm guns in direct support
Each side next gets 3 rolls on the Support table, this should be interesting...

  • 3rd Brigade
    • 1 additional AH-1 Section from Division Aviation Brigade
    • 1 A-10 Flight for air support
    • 1 x Logistics Package (LOGPAC)
      • I rolled "Supply" so decided that a LOGPAC will be a one-time boost to a company's firing dice of +1. And I get to use one of my truck logistics units...
  • 364th Guards Tank Regiment
    • 1 x SU-25 Frogfoot Flight is direct support
    • 1 x SA-9 SAM platoon
    • 1 x battery of MT-12 100mm Anti-Tank guns from the Division Anti-Tank battalion
Here are the final complete forces, organized and with a description for each commander:

364th Guards Tank Regiment

Briefing:
Your division has been in the second echelon during the first seven days of the war and has now taken the lead, although you regiment is in the Division second echelon.  You are still at fairly high strength, having been lucky enough to not be hit by NATO interdiction air strikes and your maintenance is good.

Your Division commander tasks you with providing a blocking force to cover a bridge crossing site along the Streslau River.  It is assumed that NATO engineers will destroy the bridge shortly and it is not along the Division's primary axis, so the Division commander just wants to secure it against any local counter attacks by the enemy.  You assign the mission to your Motor Rifle Battalion Commander and assign him a force of 1 x Motor Rifle Company (BMP), The Regimental Anti-Tank Company, and a Battery of M-12 100mm Anti-Tank Guns from the Division Anti-Tank Battalion.  The other two Motor Rifle Companies are attached to Tank Battalions within your regiment.

The MRB commander calls you over the regimental net highly agitated.  He has found the bridge intact and undefended!  You immediately order him to establish a bridgehead and pass the report on to the Division Commander, who orders your regiment to change direction and immediately take advantage of the situation and expand the bridgehead.

Besides the blocking force, your Regiment consists of:
  • 1st Battalion: 2 x T-72, 1 x BMP, 1 x BMP-R Platoon
  • 2nd Battalion:2 x T-72, 1 x SA-9 Platoon
  • 3rd Battalion: 1x T-72, 1 x BMP
  • The Regimental Artillery Group (RAG) of 122mm SP guns
  • 152mm SP Battalion from DAG in direct support
  • 1 x Mi-24D Section from Army Aviation
  • SU-25 Fogfoot Flight in support
The blocking force is already in place on the north side of the river in a town and on high ground.  You will create a March Order for your regiment, 3 serials, each based around one tank battalion.  Place them in order and they will arrive on the highway on the south edge of the table on:
  • 1st Battalion: Turn 2
  • 2nd Battalion: Turn 4
  • 3rd Battalion: Turn 6
Your air support isavailablee on Turn 1 and the Mi-24D's can arrive with any battalion.

3rd Brigade / 6th Armored Division

Briefing:
Your Brigade spent the first 6 days of the war on the FEBA and has taken a battering.  Your two Infantry battalions are down to ~60% strength and your Armor Battalion has been assigned to another Brigade. The Field Artillery Battalion you had in direct support is in even worse shape, suffering from airstrikes and what remains of it's batteries are pulling equipment from POMCUS stocks.  Right now you are in Division rear refitting and hoping to take on replacements and reinforcements soon.

But, your respite is short lived.  Demo charges planted by engineers failed to detonate and the Soviets have unexpectedly seized a bridge across the Streslau river.  The Division commander has contacted your TOC and ordered your Brigade to immediately eliminate the bridgehead before befor the Soviets can reinforce it and threaten the Division's flanks.  

You have organized the brigade as follows:
  • (TF Dagger) TF 1/114 Infantry (Mech): 1 x M113, 1 x M1, 1 x Stinger Section
  • (TF Hammer)  TF 2/114 Infantry (Mech): 2 x M113, 1 x M901, 1 x LOGPAC
  • (TF Saber) TF 3/313th Armor: 2 x M1, 1 x M113 , 1 x M3 Scout Platoon
  • 2 x AH-1 Sections from 2/263 Aviation (Attack)
  • A-10 Flight in direct support
Your task forces are arriving piecemeal to the battlefield, as time is of the essence, you must destroy the bridgehead fast before it can be reinforced!  Your A-10's available on Turn 1.  Number each battalion task force and the aviation support 1-4.  Each turn listed below, randomly select one to enter that turn.  Also roll a d6 to determine the entry point: 1-2 = NW corner, 3-4 on Road, 5-6 NE corner.

  • Turn 1, 1 Battalion on highway (skip random placement)
  • Turn 3
  • Turn 5
  • Turn 6

The Map

Here is the table set up and ready to go.  You can see the blocking force in position north of the river.  Next time, on to battle!

In which I decide how to decide what to play next


Does that make it a meta-decision?

It is only February, and I am starting to experience wargaming ennui brought about by:
  • I am interested in too many periods of history so as a consequence…
  • I have too many projects

Yet, I have gifts that most of my peers do not have, an amazing and understanding wife that has given me a room in our house that I can:

  • Set up a game and leave it set up
  • And has a door so I can keep the cats out

So why am I not taking more advantage of it? Because I cannot decide what to play!  I have too many choices, too many figures.  So to combat this, I am going to separate my painting / building things from my gaming.  I will continue to work on projects, but I have plenty of stuff table ready I could be playing right now.  


I am going to leverage fate and use the table above to determine what my next solo game will be, with the intention of always having something on the table being set up or played. I can always pause and leave it set up.

So, using random.org’s random number generator that uses atmospheric noise, my first game with this new process will be…. Tank on Tank: Central Front!

I will start setting up the terrain tonight!

Thursday, February 14, 2019

I support Battlegames, and you can too!


I have been promoted to Brigadier … via my support for Henry Hyde and Battlegames on Patreon! (https://www.patreon.com/battlegames/posts )

If you are not familiar with Henry, he has a long history in the historical miniatures community, and you can see his full bio here: https://www.patreon.com/battlegames/overview

I recently began supporting Henry via Patreon.  Why, you ask?
·         I appreciate the products he produces and use them
·         I enjoy his podcasts where he interviews interesting folks in the hobby, some I am not familiar with. 
·         He broadens my hobby horizons and stimulates my thinking

I also appreciate the fact the creative folks traditionally do not have a steady income stream, which makes it difficult for them to produce the creative output the rest of us love.  So, for as little as $1 a month or more (I really suggest more), you can help keep Henry creating.  He is currently working on a Wargames Campaign book that I am eagerly anticipating.

I pony up the cost of a few fast food meals eaten out, and I feel I get my money’s worth with the extra content that sponsors get and for very little sacrifice I am helping Henry to sustain his work.  I am like Pope Julius II with Michelangelo, sponsoring a great artist!  Well, maybe not exactly, but you get the idea.

Note I am not affiliated with Battlegames in any way besides being and avid fan of Henry’s.  If you chose not to support Henry, find another worthy creator and throw a few greenbacks their way.  You’ll be glad you did!

Tuesday, February 5, 2019

Ruritanian-Elbonian War of 1925: Battle 2, Escape!


Initial Elbonian People’s Army (EPA) attacks in the south have been repulsed by the Royal Ruritanian Army (RRA).  Meanwhile, on the North Ruritanian Plain, the RRA has simultaneously launched its own offensive (historians are still divided on who the aggressor was during the Ruritanian-Elbonian War of 1925.)

Note: I randomly Generated Scenario 13: Escape from One Hour Wargames

This was planned by the RRA high command as a limited spoiling attack to throw the EPA off balance.  The RRA send a motorized column of a reinforced rifle battalion to raid into Elbonian territory to attack a supply depot.  As they return to friendly positions, they find a blocking force in their way and scouts report EPA units are converging.  It is imperative to break through and not be swamped by the EPA!

Victory Conditions: The RRA wins if they exit at least 4 Truck and 4 Non-Truck units off of the table at the hex marked E, aircraft do not count for victory purposes.  The EPA win if they can prevent this.
The RRA Forces consist of: (deploy first in within 1 hex of hex marked A, Takes first turn)

  • 1 x HQ
  • 4 x Infantry Companies
  • 2 x MG Companies
  • 6 x Trucks
  • 2 x Armored Cars
  • 1 x Aircraft (Ace Pilot)

The EPA forces consist of:
Start of the game within 1 hex of the hex marked B

  • 1 x Infantry Company
  • 1 x Machine Gun company

Turn 3

  • 2 x Cavalry Squadrons at hex A
  • 1 x aircraft at point C

Turn 4

  • 2 x Armored Cars at point D

Turn 5

  • 1 x HQ
  • 3 x Infantry Companies at hex E
  • 1 x Machine Gun Company at hex E

Turn 6

  • 1 x Artillery at Hex D

The battlefield
(Any suggestions on a better way to draw hex maps is appreciated)

The Battle

I used my Ruritanian-Elbonian War rules version 3. They are the definitive historical simulation of the conflict!
Here is the table set up.  The RRA column is in the upper left corner

The RRA prepares to make good its escape.  Units next to trucks are mounted in them.


 RRA Lead companies clear the first EPA blocking position
 But then take grievous losses from enfilading Maxim guns covering the choke point
EPA reinforcements begin to arrive, including air support that knocks out RRA armored cars screening the flank of the column.

 The RRA drives off the Maxim guns and tries to run for it before more EPA troops arrive
 But the EPA airforce lights up the truck column
Here we have the end game.  Most of the RRA forces are still disorganized at the choke point.  The RRA fighter ace finally decides to try to protect the convoy, but fails to do any damage and is the only survivor.  The rest of the RRA column is forced to scatter or surrender as their escape is blocked by a fresh EPA Infantry battalion supported by armored cars.

A decisive Elbonian victory!

The war continues with neither side gaining the upper hand.  So far, this is a very enjoyable and rewarding little project.  Until next time, good gaming!


A Visit to the South Carolina Military Museum

My wife and I spent an enjoyable Saturday visiting the South Carolina Military museum with my father, who is a healthy and robust 90.   The museum is focused on the history of the South Carolina militia and National Guard and is located behind state headquarters.  I, of course, was interested as a former guardsman, but I was very excited and surprised by the size of the collection and its presentation.

If you are ever in Columbia, it is worth the stop.  Here are a few snaps from our visit, click to enlarge.  The collection is much larger than this but this will give you an idea.


My dad examining the list of Medal of Honor recipients (3 of whom are from our home town of Camden and buried in Quaker Cemetary

A list of engagements fought in South Carolina during the AWI with a 2nd SC Regiment uniform

My wife in the chronological gallery of SC Militia Uniforms

SC Militiamen hunting protecting Texas from Villa in 1916

The museum has an array of Great War artifacts, including these
An MG08 dated 1918 on the feed tray.  Now I have a better understanding of why the crew as so large

My grandfather was in the 81st Division, but was in New York on Armistice Day in 1918 and did not make it to Europe.
A nice diorama, I am sure some fo you guys can ID the figure manufacturer
M1917 Machine gun, a mainstay of the US Army through the Korean War

A BAR in the WW2 collection

My dad was 12 during the Carolina Maneuvers in 1941 and our home town was at the center of some of the fiercest "fighting."  He remembers huge convoys of trucks and tanks passing the farm.


I want one of these for my library at home

Indoor vehicle collection.  They also have a separate area with artillery, but I did not get a good picture

A PaK36 with Stielgranate charge cut away to show interior

A Desert Storm diorama made with I believe GHQ models
In the 80's we used to have a battalion of 8-inch guns, here is one of those monsters


And here is an M42 Duster with an M-48 Tank in the background


I'd like to end with thanks to all of my comrades in the SC Guard past, present, and future, but especially to the instructors at my last unit, the 218th Regiment (Leadership).  I spent the Global War on Terror in a nice classroom delivering instruction, but almost every other member of the cadre was a veteran of one, two, or even three deployments to a war zone.  Ttheir willingness to sacrifice as true citizen soldiers is an inspiration to all.