Selecting the Scenario and Forces
So the first roll on my random Game Decider came up a 1, Tank on Tank: Central Front. To select the scenario, I randomly selected from the scenarios in One-Hour Wargames and rolled a 5, Bridgehead.I will not reproduce the entire scenario from the book (buy the book!) but here is a summary of the situation:

Given I am playing the Central Front circa 1985, I chose to make NATO the "Red" side and the Soviets "Blue."
- To generate the forces, I use Ivan Sorensen's table from FiveCore Brigade Commander, an excellent set of rules at the same scale, 1 base = 1 company. They are only $9.99 and packed with useful stuff beyond the rules, which are excellent. I used the Army Generator on page 51, combined with my own impeccable (?) military judgment and my knowledge of TOE's of the period.
First I rolled to see what sort of force each side would have and I named my overall forces to help immerse me in the game. I rolled:
- US Army 3rd Brigade / 6th Armored Division: (Hereafter 3rd Brigade)
- 43 = An Infantry Brigade
- Soviet 364th Guard Tank Regiment: (Hereafter 364th GTR)
- 88 = An Armored Brigade
Next is to see how many "Main" troop types I will have. The tables assume a 9 company Regiment so I will tweak a little as both units would be organically combined arms. This is fine, as Ivan encourages you to use his rules as a toolbox. I decide that 3rd Brigade is "stretched" as it is being hastily thrown into the fray and the 364th Guards TR is "average," as it has been in the second echelon and not suffered too badly yet.
I roll the dice and get:
- 3rd Brigade
- 33 = 5 Main
- I interpret this to mean that 3rd brigade has 5 maneuver companies. I organize them as:
- 1/114 Infantry (Mech): 2 x M113 Companies
- 2/114 Infantry (Mech): 2 x M113 Companies, 1 x M901 Anti-Tank Company
- 364th Guards Tank Regiment
- 58 = 7 Main
- As in my organizations, a Tank regiment has 3 x battalions consisting of 2 x company size units, I interpret this to mean the unit is slightly under strength, so the Regiment will have 5 x T-72 companies split between its 3 battalions
Next is to roll for "Secondary" units
- 3rd Brigade
- 73 = 3 Secondary Units
- I will make these armor, so 3rd Brigade has attached 3/313th Armor of 3 x M1 Tank Companies
- 364th Guards Tank Regiment
- 93 = 3 Secondary Units
- The Regimental Motor Rifle Battalion is at full strength, with 3 x BMP Companies
I use the Attachments table next to see what each unit has besides maneuver units, with 3rd Brigade as "Well Equipped" and 364th GTR as "Moderately equipped"
- 3rd Brigade
- 36 = 3 Attachments
- I select:
- 1 x M3 Scout Platoon
- 1 x Stinger SAM Section
- 1 x AH-1 Section from the Division Aviation Brigade
- 364th Guards Tank Regiment
- 61 = 4 Attachments
- I select:
- 1 x Regimental Artillery Group (122mm SP Guns)
- 1 x BMP-R Scout Platoon
- 1 x Regimental Anti-Tank Company (AT-5)
- 1 x Mi-24D Attack Helicopter section from Army Aviation
You can see the forces are starting to come together and as I go through the process, I am building a story for each unit in my head, that I will share at the wrap up at the end. Next up is Fire Support using the "Packets" collumn and for each unit, I roll:
- 3rd Brigade
- 08 = Zero Artillery Support!
- 364th Guards Tank Regiment
- 18 = 1 Fire support
- I select a Battalion of 152mm guns in direct support
Each side next gets 3 rolls on the Support table, this should be interesting...
- 3rd Brigade
- 1 additional AH-1 Section from Division Aviation Brigade
- 1 A-10 Flight for air support
- 1 x Logistics Package (LOGPAC)
- I rolled "Supply" so decided that a LOGPAC will be a one-time boost to a company's firing dice of +1. And I get to use one of my truck logistics units...
- 364th Guards Tank Regiment
- 1 x SU-25 Frogfoot Flight is direct support
- 1 x SA-9 SAM platoon
- 1 x battery of MT-12 100mm Anti-Tank guns from the Division Anti-Tank battalion
Here are the final complete forces, organized and with a description for each commander:
364th Guards Tank Regiment
Briefing:
Your division has been in the second echelon during the first seven days of the war and has now taken the lead, although you regiment is in the Division second echelon. You are still at fairly high strength, having been lucky enough to not be hit by NATO interdiction air strikes and your maintenance is good.
Your Division commander tasks you with providing a blocking force to cover a bridge crossing site along the Streslau River. It is assumed that NATO engineers will destroy the bridge shortly and it is not along the Division's primary axis, so the Division commander just wants to secure it against any local counter attacks by the enemy. You assign the mission to your Motor Rifle Battalion Commander and assign him a force of 1 x Motor Rifle Company (BMP), The Regimental Anti-Tank Company, and a Battery of M-12 100mm Anti-Tank Guns from the Division Anti-Tank Battalion. The other two Motor Rifle Companies are attached to Tank Battalions within your regiment.
The MRB commander calls you over the regimental net highly agitated. He has found the bridge intact and undefended! You immediately order him to establish a bridgehead and pass the report on to the Division Commander, who orders your regiment to change direction and immediately take advantage of the situation and expand the bridgehead.
Besides the blocking force, your Regiment consists of:
- 1st Battalion: 2 x T-72, 1 x BMP, 1 x BMP-R Platoon
- 2nd Battalion:2 x T-72, 1 x SA-9 Platoon
- 3rd Battalion: 1x T-72, 1 x BMP
- The Regimental Artillery Group (RAG) of 122mm SP guns
- 152mm SP Battalion from DAG in direct support
- 1 x Mi-24D Section from Army Aviation
- SU-25 Fogfoot Flight in support
The blocking force is already in place on the north side of the river in a town and on high ground. You will create a March Order for your regiment, 3 serials, each based around one tank battalion. Place them in order and they will arrive on the highway on the south edge of the table on:
- 1st Battalion: Turn 2
- 2nd Battalion: Turn 4
- 3rd Battalion: Turn 6
Your air support isavailablee on Turn 1 and the Mi-24D's can arrive with any battalion.
3rd Brigade / 6th Armored Division
Briefing:
Your Brigade spent the first 6 days of the war on the FEBA and has taken a battering. Your two Infantry battalions are down to ~60% strength and your Armor Battalion has been assigned to another Brigade. The Field Artillery Battalion you had in direct support is in even worse shape, suffering from airstrikes and what remains of it's batteries are pulling equipment from POMCUS stocks. Right now you are in Division rear refitting and hoping to take on replacements and reinforcements soon.
But, your respite is short lived. Demo charges planted by engineers failed to detonate and the Soviets have unexpectedly seized a bridge across the Streslau river. The Division commander has contacted your TOC and ordered your Brigade to immediately eliminate the bridgehead before befor the Soviets can reinforce it and threaten the Division's flanks.
You have organized the brigade as follows:
- (TF Dagger) TF 1/114 Infantry (Mech): 1 x M113, 1 x M1, 1 x Stinger Section
- (TF Hammer) TF 2/114 Infantry (Mech): 2 x M113, 1 x M901, 1 x LOGPAC
- (TF Saber) TF 3/313th Armor: 2 x M1, 1 x M113 , 1 x M3 Scout Platoon
- 2 x AH-1 Sections from 2/263 Aviation (Attack)
- A-10 Flight in direct support
Your task forces are arriving piecemeal to the battlefield, as time is of the essence, you must destroy the bridgehead fast before it can be reinforced! Your A-10's available on Turn 1. Number each battalion task force and the aviation support 1-4. Each turn listed below, randomly select one to enter that turn. Also roll a d6 to determine the entry point: 1-2 = NW corner, 3-4 on Road, 5-6 NE corner.
- Turn 1, 1 Battalion on highway (skip random placement)
- Turn 3
- Turn 5
- Turn 6
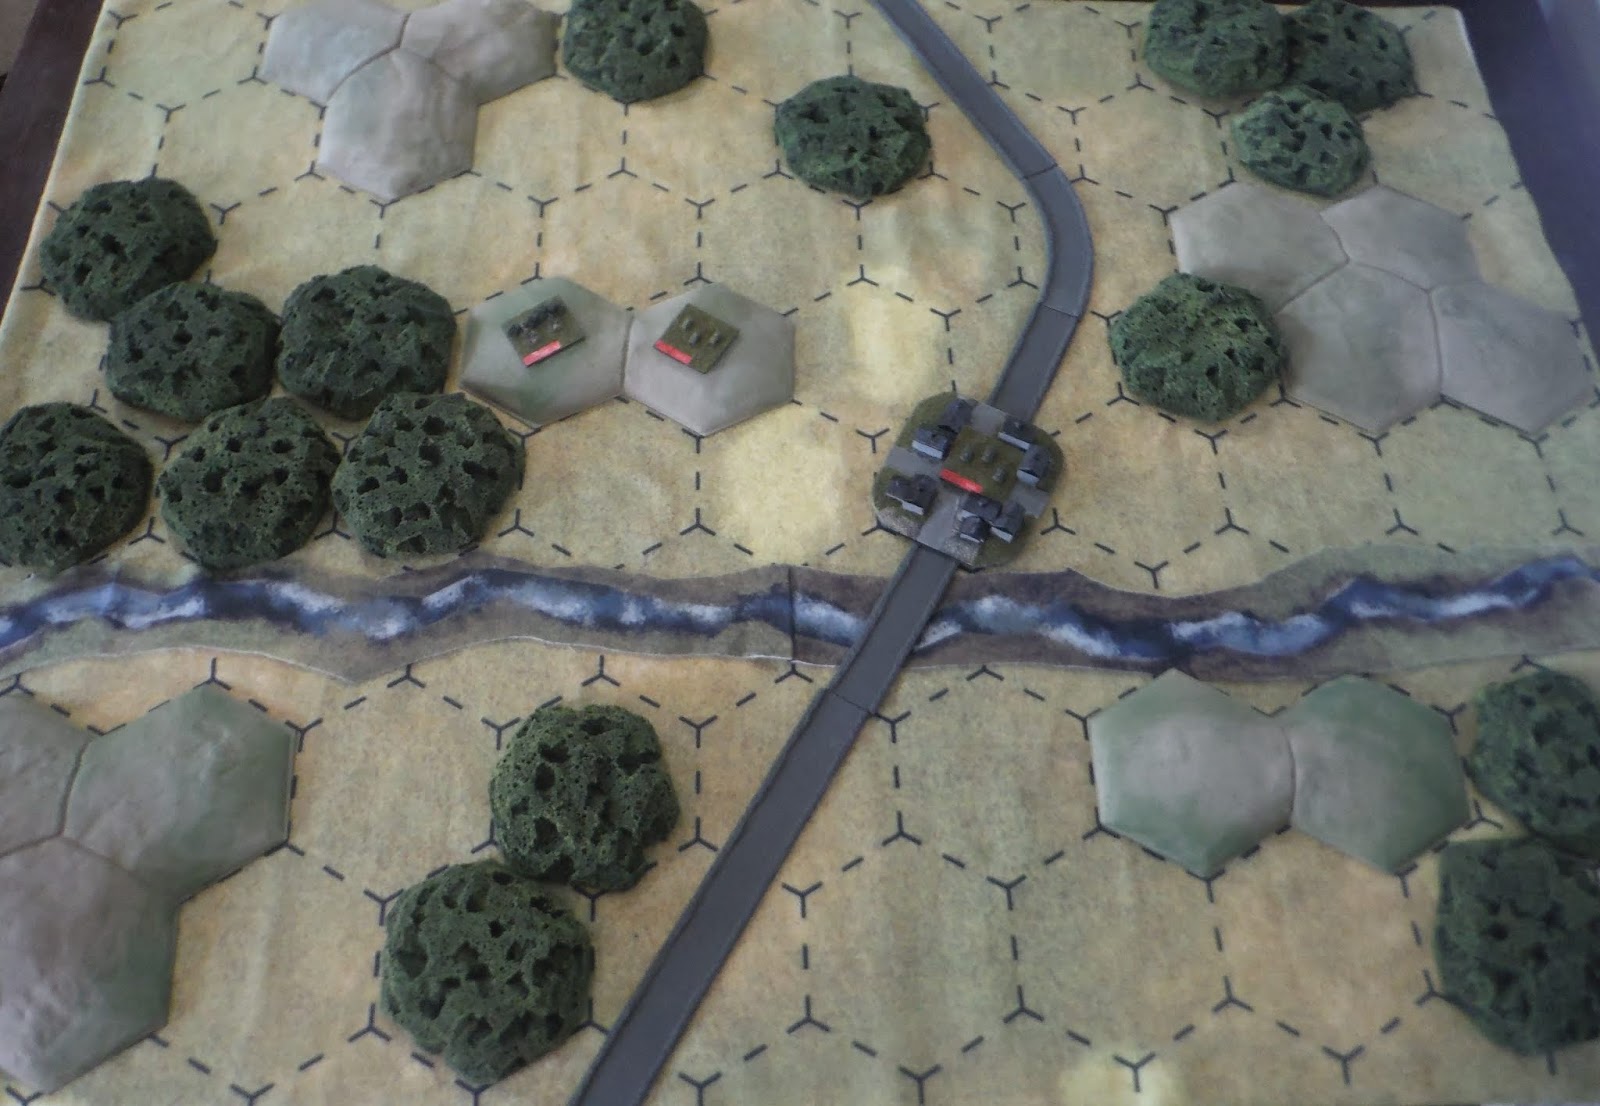
The Map
Here is the table set up and ready to go. You can see the blocking force in position north of the river. Next time, on to battle!
Oooh this looks good! Cant wait to see what happens!
ReplyDeletenice planning post, look forward to the engagement.
ReplyDeleteThanks! Just posted the battle report.
ReplyDelete