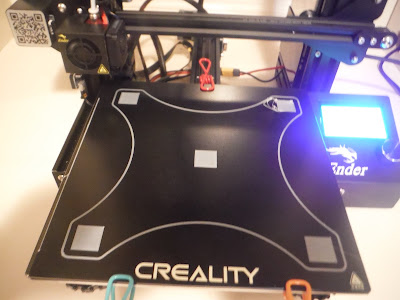
I won't give a complete blow by blow or how-to, but here is how I have spent my limited free time over the last few weeks. We got a Creality Ender 3 Pro, after some shopping around, but mostly because that is what John has and it seemed highly recommended by Fat Dragon Games.
It was very affordable, just a smidge over $200, and I went ahead and got the glass print bed for $12 more. For those of you not familiar with 3D printing, see the Fat Dragon Link above. I have to say that I LOVE IT! This is not a plug-and-play experience, it is a kit and requires some basic mechanical skills to assemble, but no soldering, etc. It should not be beyond the skills of anyone who paints miniatures.
And I love it because it reminds me of my childhood, sitting in a cold garage in 1981 with my dad getting our TRS-80 Color Computer upgraded from 16k to 64k of memory. Yes, that is kilobytes) Unless you are willing to plunk down ~$2000, it is still a hobby with a DIY component, which is just fine by me.
It took me about 3 days to finish putting it together, fiddling with it a little at a time in the evenings, and I methodically followed the advice here, in fact I did not even refer to the instructions:
When I was done, I had this!
The hardest part was manually leveling the bed. It was not too difficult, but I took my time. It is like gapping a sparkplug but with the hot end fo the printer and a piece of paper. Unfortunately, I was terrible at gapping spark plugs and here is the result fo my first print.
I managed to put the magnetic print bed on upside down and the print head was to low. It just dug a nice hole into the print bed. Fortunately, the printer came with 2 print heads, and I had the glass bed I had purchased and not installed yet.
The next Print failed because the Bowden tube that feeds the plastic to the hot extruder was not seated all the way. I found and fixed that.
I was finally able to get a test pattern printed out, but one corner was too high as you can see.
Some more fiddling and I finally got a good test print.
I think the cause was some of the cables on the back catching, but I managed to finally print one wargame worth item, a 1/150 scale M26 Pershing that will eventually be used in my 10mm Korea project.
Hard to tell from this picture, but the detail is pretty good, I may give it a quick paint job soon so you can see it better. Since taking these pictures I have kept it running every night and have printed 3 more Pershings, accessories for the printer like drag chains for the cables, a filament guide, and a tool holder.
You can expect to see quite a bit more on the blog, as I have been prototyping a trench system for my 10mm WW1 troops, printing tanks in various scales, and creating useful markers for games. I need to get back to my 3mm East Front project, but I can see this being an enjoyable adjunct to the hobby.
I am done with the last Soviets and am basing them, so stay tuned. Good gaming!


Good luck in 3D printing and in games
ReplyDelete